
"파나소닉 네트워크 IP카메라(Panasonic Network Camera)
WV SC385 스피드돔 IP 세팅법"
첫번째, 영문 버전 인스톨 파일 전문
Network Camera
Read Me First
Ver.1.04
(c) Panasonic System Networks Co., Ltd. 2010
==========================================================================
1. Introduction
This CD-ROM contains the software for the Network Camera.
2. Installation Procedure
(1) EasyIpSetup
The "EasyIpSetup.exe" starts the Panasonic IP setup software.
*The following cameras are able to use this EasyIpSetup (as of October 2010).
WV-NF284, WV-NS202, WV-NS202A, WV-NP244, WV-NP1004, WV-NW484S, WV-NS954, WV-NW964,
WV-NF302, WV-NP304, WV-NP502, WV-NW502S, WV-SP306, WV-SP305, WV-SP302, WV-SF336, WV-SF335, WV-SF332,
WV-SP105, WV-SP102, WV-SC385(*1), WV-SW395(*1), WV-SC384(*1), WV-SW352(*1),
WV-SW355(*1).
*The MAC address/IP address of the camera to be configured will not be displayed
when around 20 minutes have passed after turning on the power of the camera.
However, if the following settings are default setting, the MAC address/IP address
of the camera to be configured can be displayed.
DHCP/IP address/Net mask/Default gateway/HTTP port/The default user name and password
*Only some models can use the following functions with this EasyIpSetup.(*1)
Camera Name display to the Camera List
The AutoIP selection in the Network Settings
(2) Instructions
The instruction document starts the operating instructions.
Note: Adobe Reader will be required.
If the Adobe Reader is not yet installed on your system please install
the Adobe Reader.
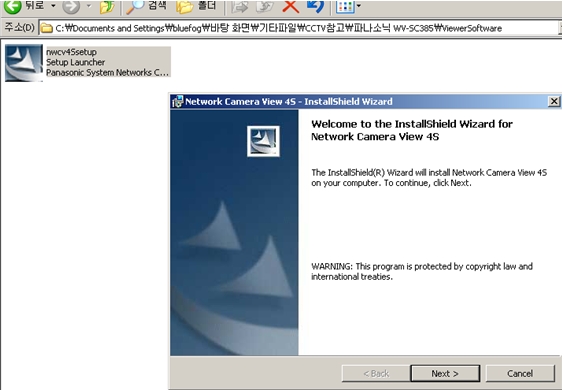
(3) Viewer software Installation
The "nwcv4Ssetup.exe" starts the installer.
Please proceed following the instructions on the screen.
(4) HTML files
The "upload.bat" starts the installation of the HTML-files to the camera.
Note.
*"IP address" and "the default user name and password" of the camera
should be default setting ,and "FTP access to camera" of the camera
should be "Allow" to install HTML-files.
*Depending on the firewall setting of the PC, data transmission via FTP
to the camera may sometimes be restricted.
When data transmission is interrupted, execute "upload.bat" again after
invalidating the firewall function of the PC and initializing the HTML
files in the camera.
*Do not turn off the power of the camera for around 2 minutes after
finishing the "upload.bat".
두번째, 파나소닉 WV-SC385 IP카메라 세팅법
http://www.axis.co.kr/product_new/anc/internet.php 을 참고할 수 있음1. CD안에 뷰어소프트웨어(viewer software)인 nwcv4Ssetup 을 IP카메라와 인터넷 공유기에 연결된 컴퓨터나 노트북에 설치
2. CD에 들어있는 파나소닉 IP카메라 세팅 프로그램인 EasyIpSetup 을 실행

3. Search를 누르면 연결된 네트워크 카메라 목록이 생성됨
4. 원하는 네트워크 카메라를 선택한 후 MAC 주소를 확인하고 network setting을 함
5. 세팅메뉴에서 Auto IP 모드로 놓고, DNS도 Auto 모드로 바꾼 뒤 저장함 (고정 혹은 DHCP모드는 매뉴얼참고)
6. 그리고 Camera Access 로 들어가서 영상을 확인함(아래 그림)
->보통 Active-x 프로그램을 3개 정도 설치하면 확인 가능

카메라의 초기 설정메뉴 진입시 ID: admin / Password: 12345

7. IP카메라 영상이 나오면 빠져나와서 network setting을 현재 설정된 IP로 놓고 Static 모드(고정)로 함
8. 현재 IP카메라의 MAC주소, IP, Port, 카메라 이름을 적어놓음
9. CCTV 카메라를 인터넷에 연결하려면 공유기의 포트포워딩과 DDNS(viewnetcam.com) 설정을 함
10. 기본정보 - CCTV 카메라의 초기 IP 192.168.0.10 이고, 포트는 80
만약 변경하였다면 다음과 같이 URL을 인터넷 주소창에 입력함
예시) http://192.168.0.123:8080(IP와 포트8080으로 변경했을 경우)

** DDNS 등록하는 방법 (팁 - 공유기 자체의 DDNS를 사용하셔도 무방합니다)


11. CCTV 카메라 영상을 저장할 서버가 있는 컴퓨터에 레코딩 프로그램을 설치하고 IP카메라를 설정함 (스패너모양 클릭)

12. Add camera를 누르면 네트워크 카메라 이름과 주소, 포트 등을 설정할 수 있음
->카메라 추가시 라이센스가 필요할 경우 파나소닉 본사에 문의함

13. 저장하려는 CCTV 영상 포맷을 선택(jpeg or mpeg-4 or h-264)하고, 해상도와 화질을 설정함

14. CCTV 영상에서 움직임없는 파일을 저장하지 않으려면, Motion detection 메뉴에서 설정함

모든 설정은 한 번씩 확인하고 필요한 부분은 한국에서 파나소닉 네트워크 카메라를 전용으로 취급하는 신도컴퓨터 홈페이지 자료실이나 파나소닉 자료실 그리고 본사에 문의할 수 있고, 설정이 잘 저장되었는지 확인함